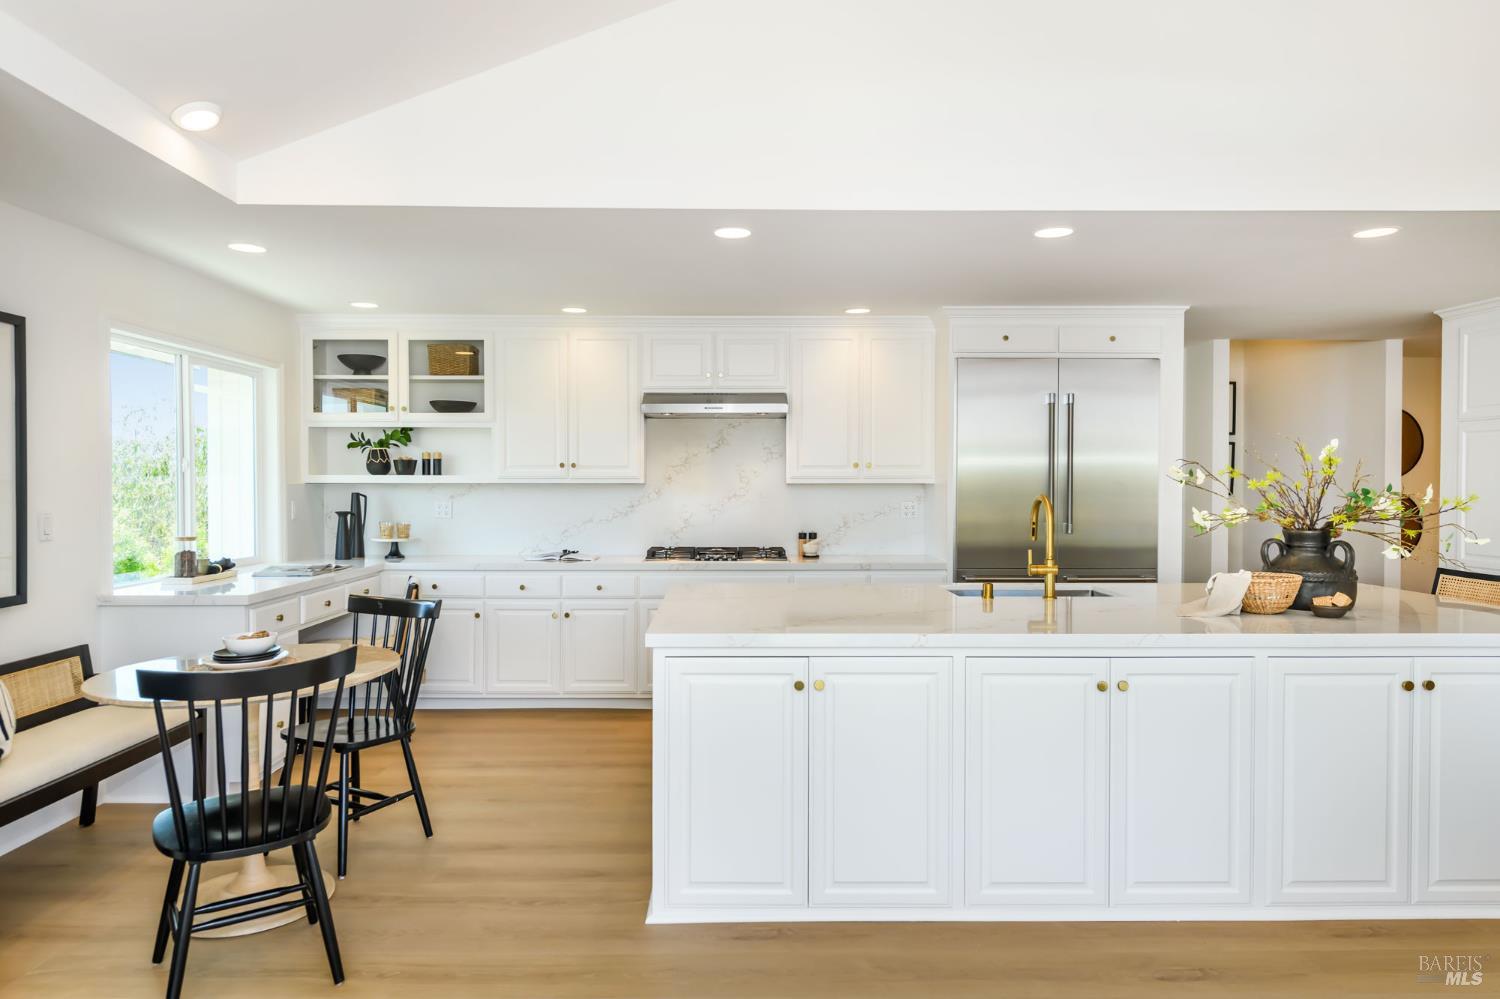
Perfectly positioned within prestigious Peacock Gap, this spacious & light-filled Contemporary home impresses with its gracious scale, beautiful quality of light, & thoughtfully designed interiors that blur the line between indoors & out, offering a rare sense of calm & comfort, while capturing the ease of California living. A sought-after Larkin residence, the home showcases hallmarks of the distinctive design, including vaulted ceilings, broad hallways, & walls of glass that enhance its openness & connection to the surrounding landscape. A grand foyer creates a striking first impression before opening to the formal living rm., where soaring ceilings create volume, new laminate flooring adds warmth & continuity, & an expansive fireplace serves as the room's focal point. Large windows frame views of the private backyard & lush gardens, while sliding doors open directly to a spacious Trex deck for seamless indoor-outdoor living. The formal dining rm. highlighted by a tray ceiling & statement brass chandelier, offers an elegant setting for memorable gatherings. Recently refreshed & truly the heart of the home, the chef's kitchen is both beautiful & functional, featuring an oversized island with bar seating & abundant storage, quartz counters, custom cabinetry, SS appliances including a Thermador refrigerator, double ovens, & a Bosch gas cooktop, along w/ a large pantry. At the far end of the kitchen, a built-in desk captures bridge & water views. A sunlit eat-in nook creates the perfect spot for morning coffee before flowing into the inviting family room, where a stately fireplace, walls of glass, & sliding doors to the deck & gardens further enhance the relaxed lifestyle. The primary suite is a peaceful retreat w/ a beautifully appointed en-suite bath featuring a double vanity, oversized shower w/ dual showerheads, & a walk-in closet. A chic powder room completes this level. Just 5 steps up is the secondary bedroom wing with 3 spacious sunlit BD with a shared hall BA