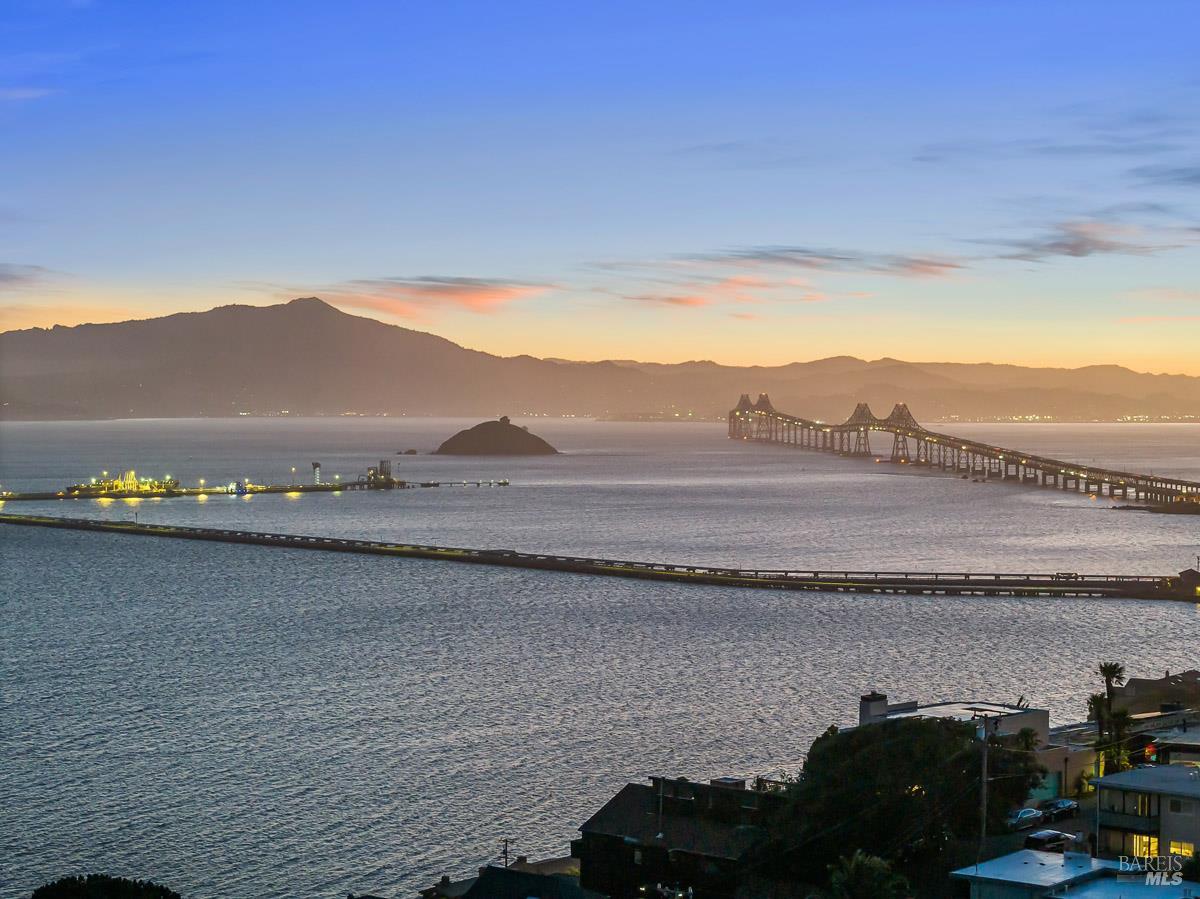
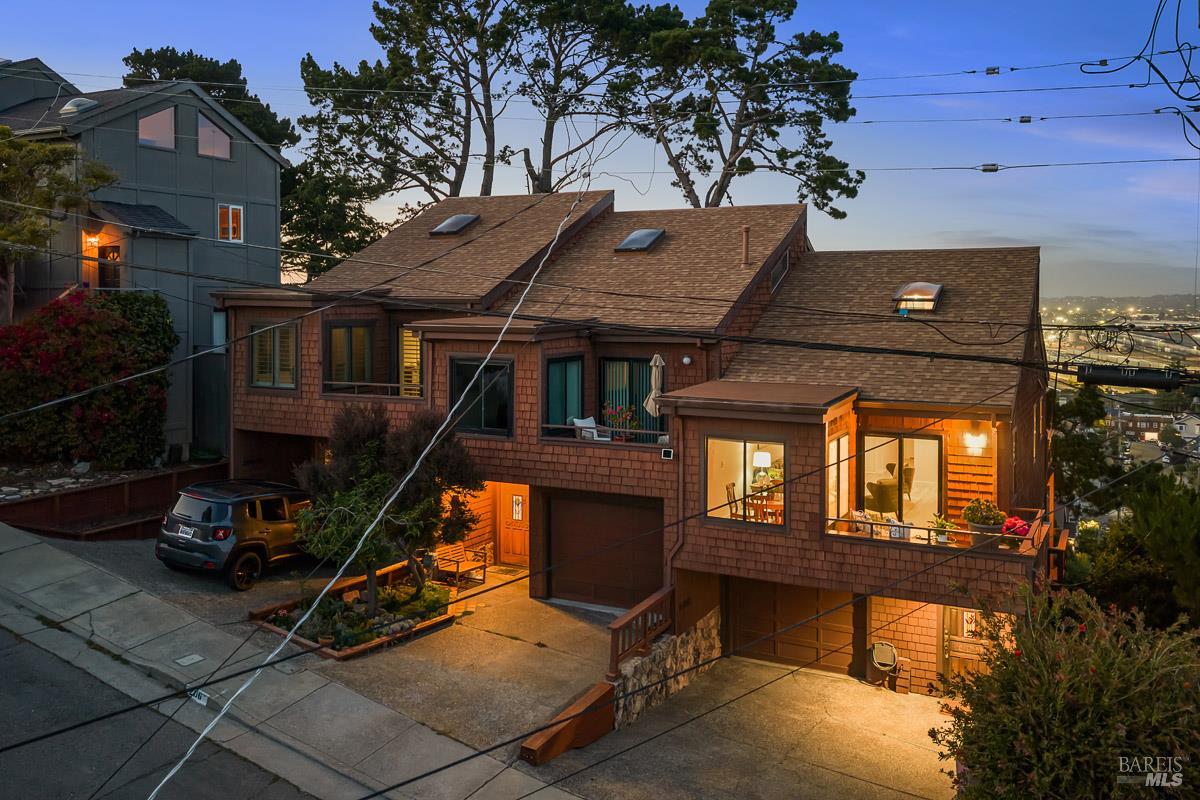
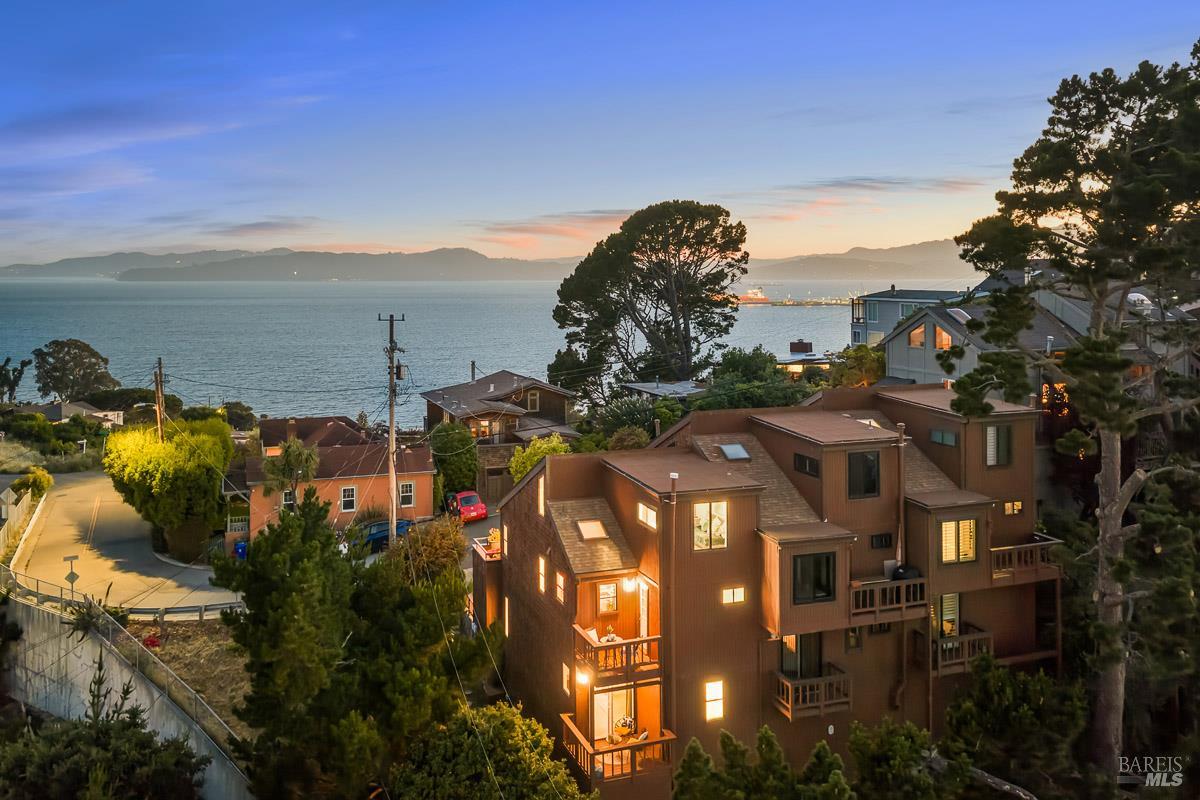
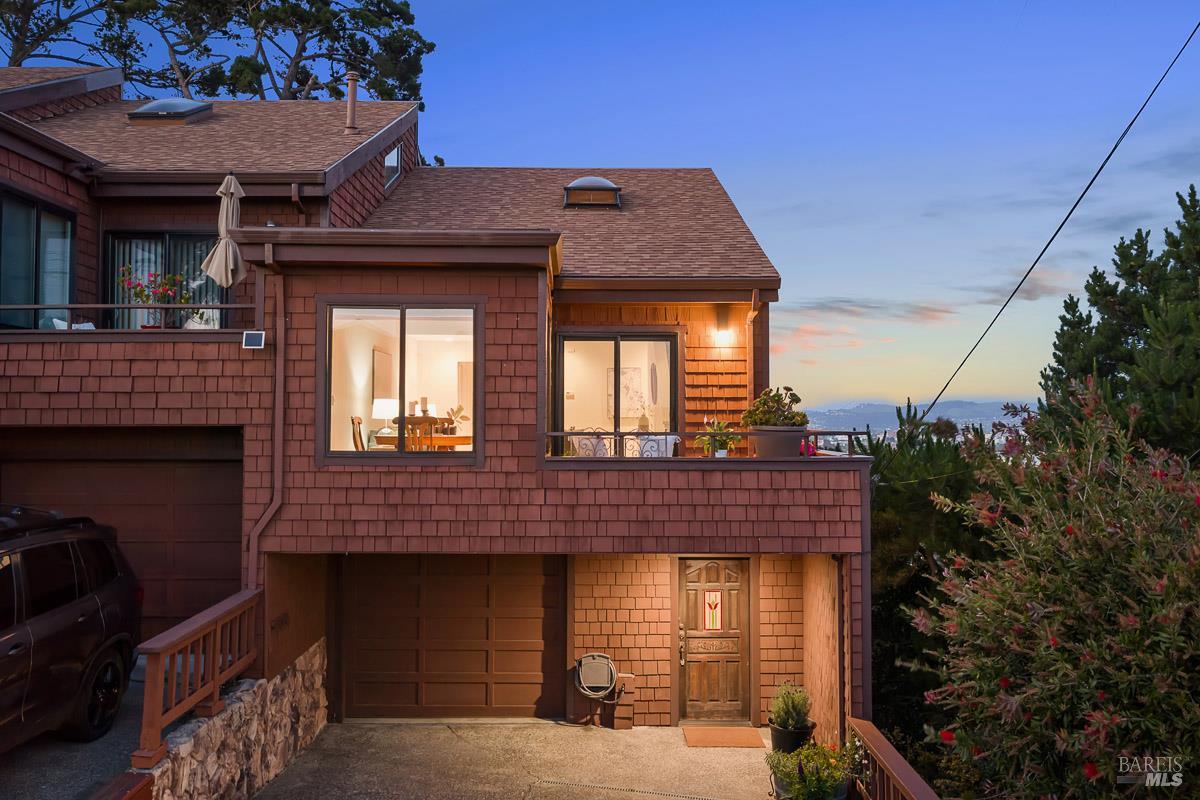
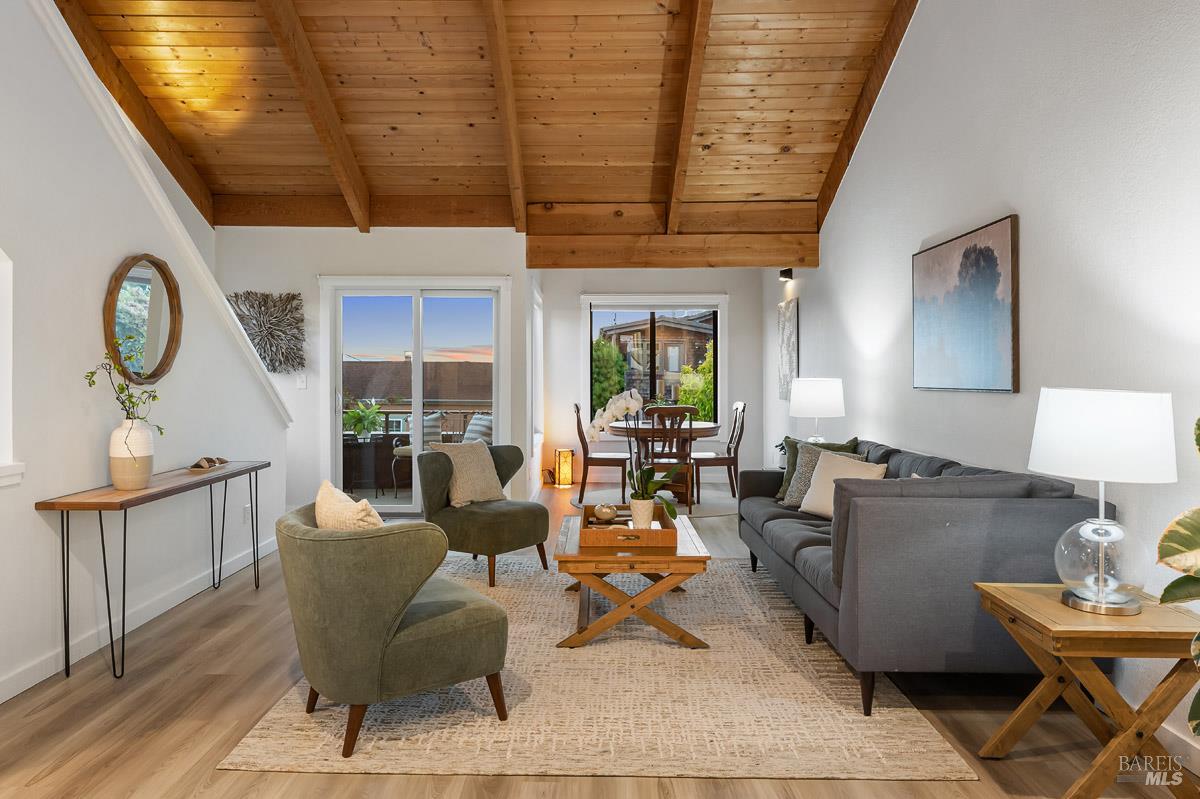
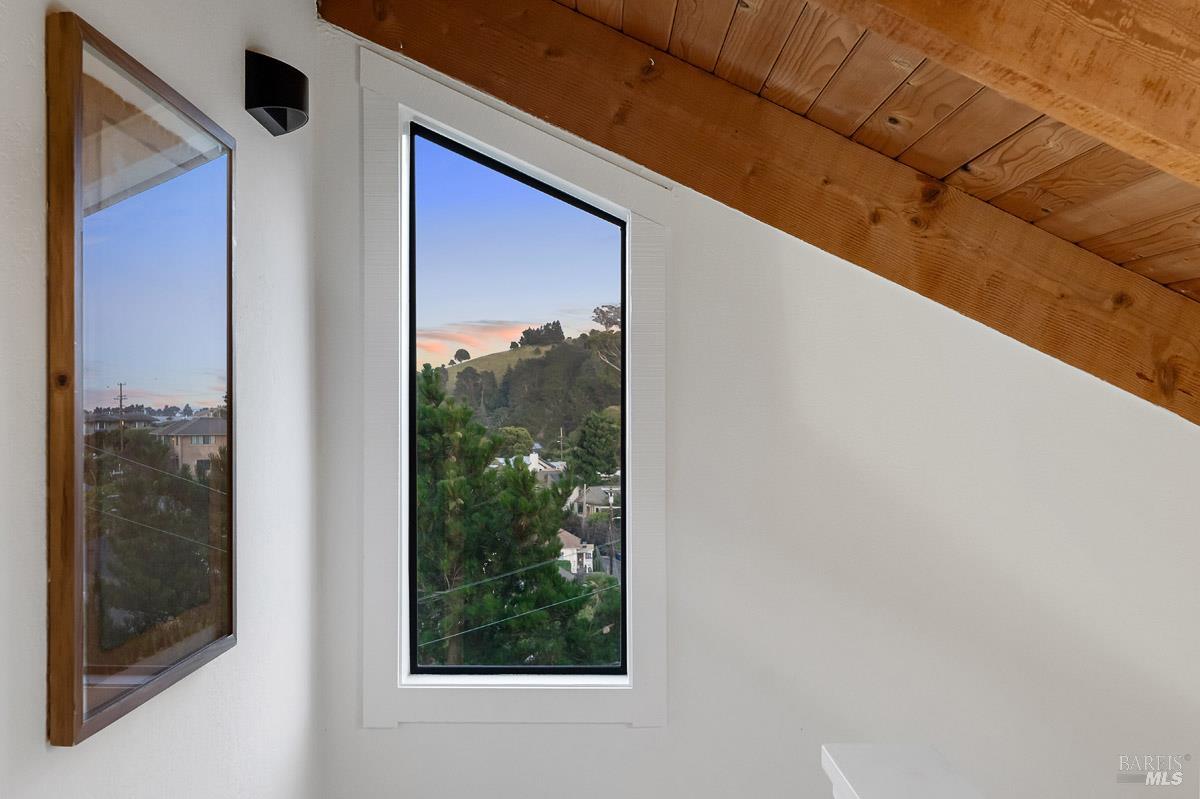
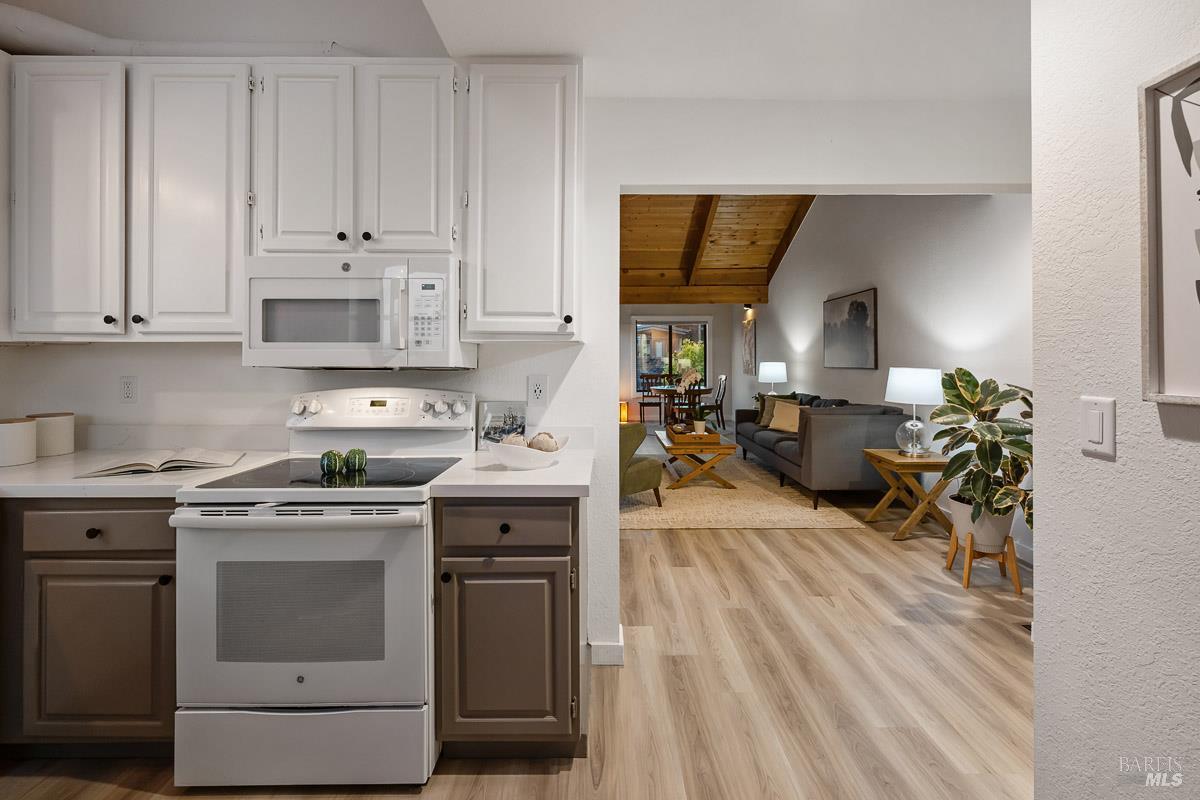
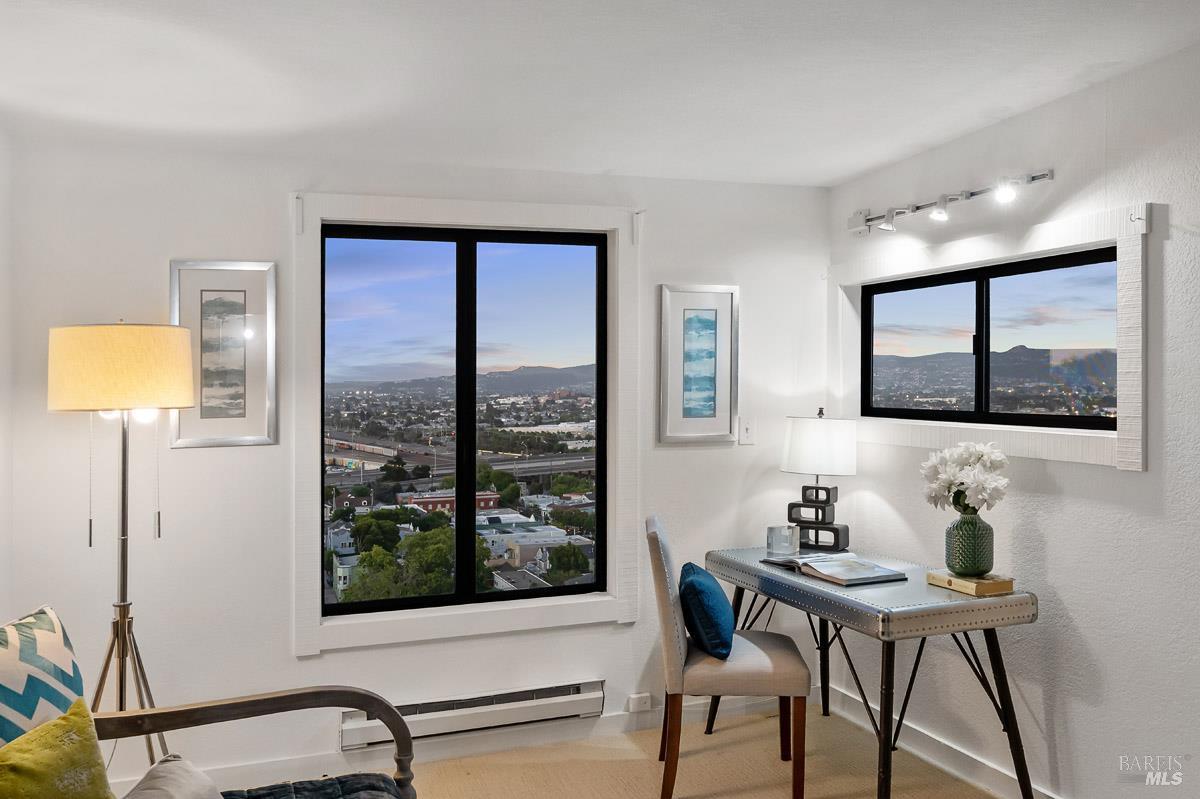
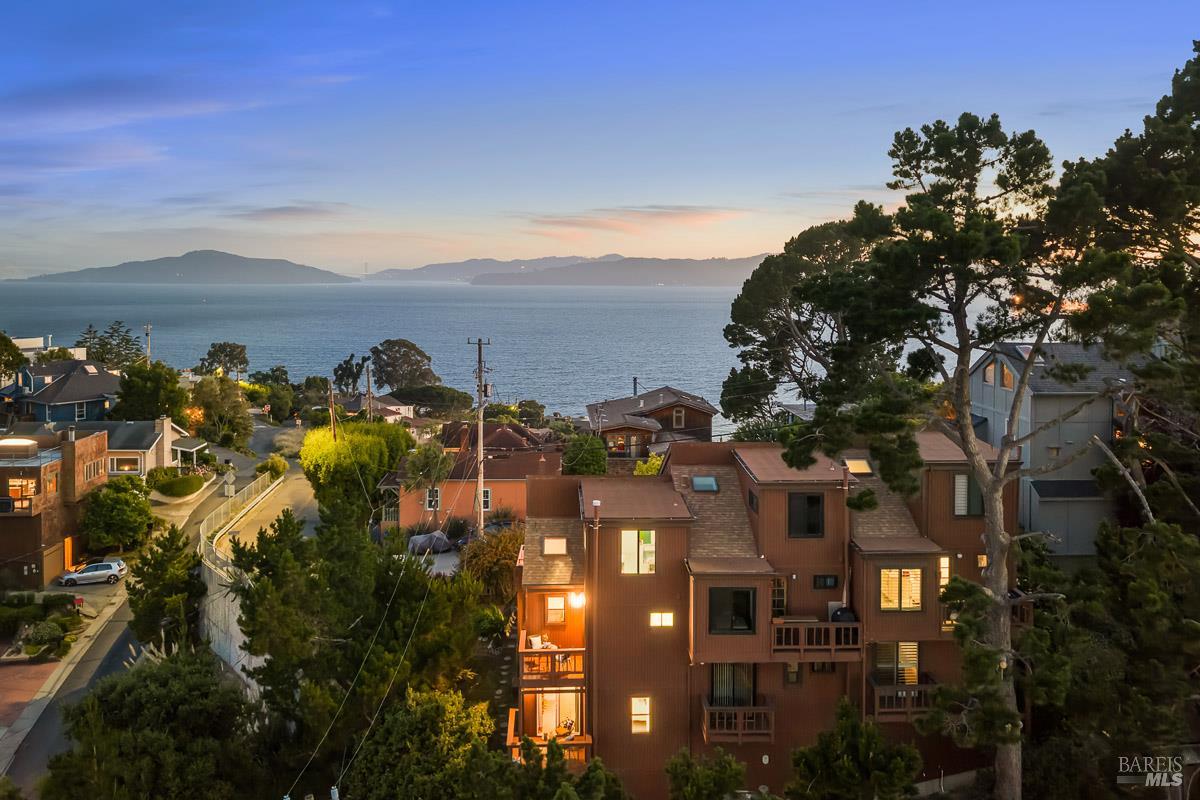
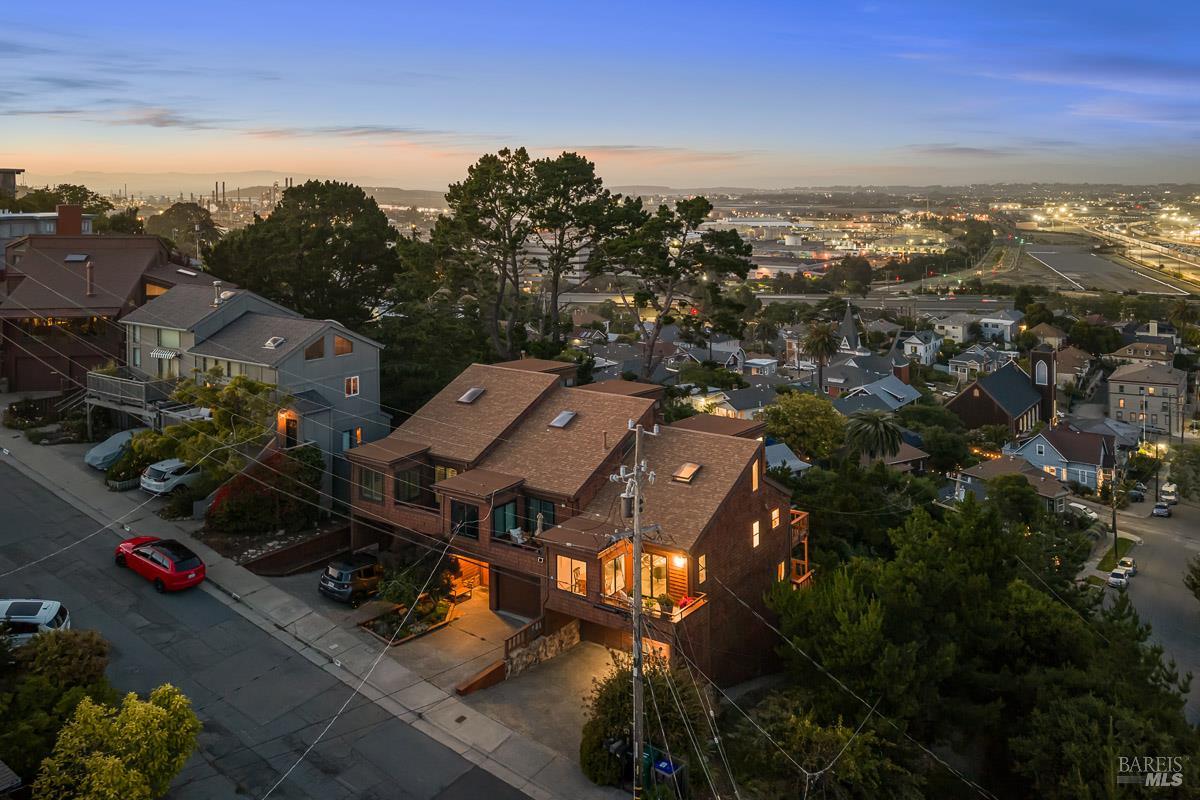
204 Water St, Point Richmond, CA 94801
$719,000Price
2Bedrooms
2Bathrooms
1,317Sq Ft
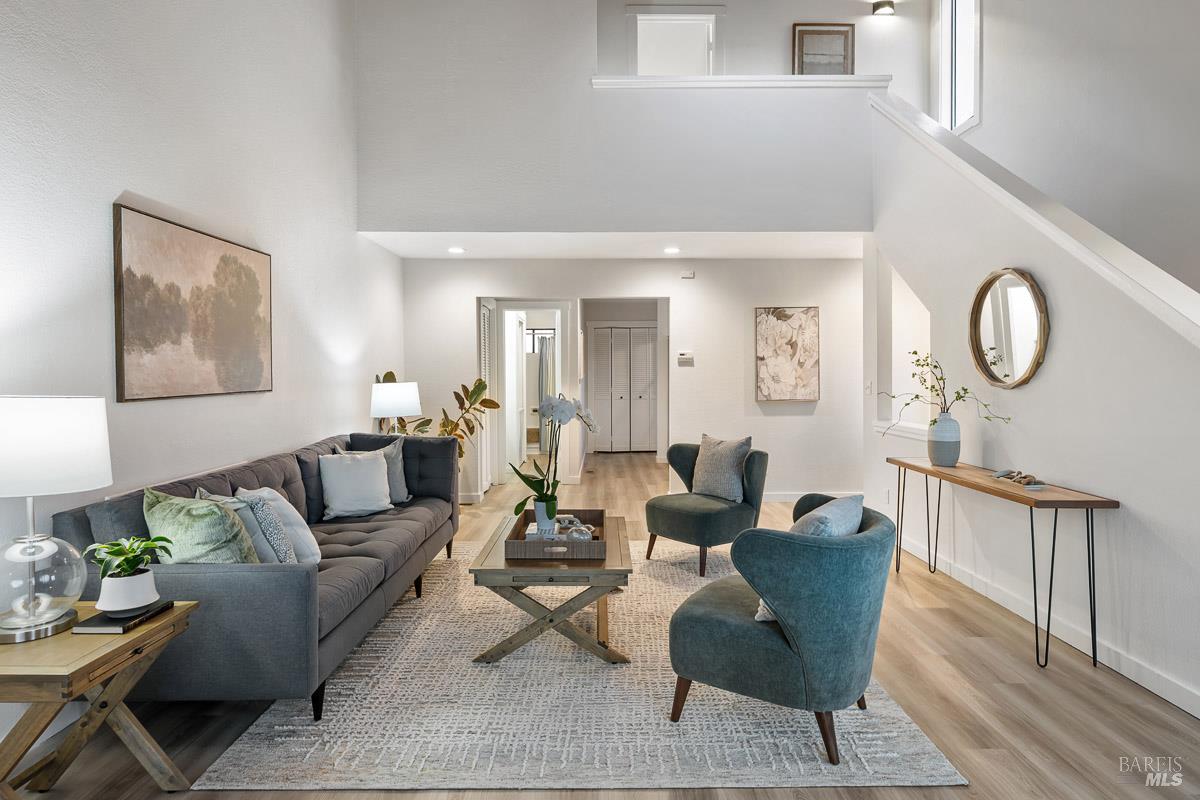
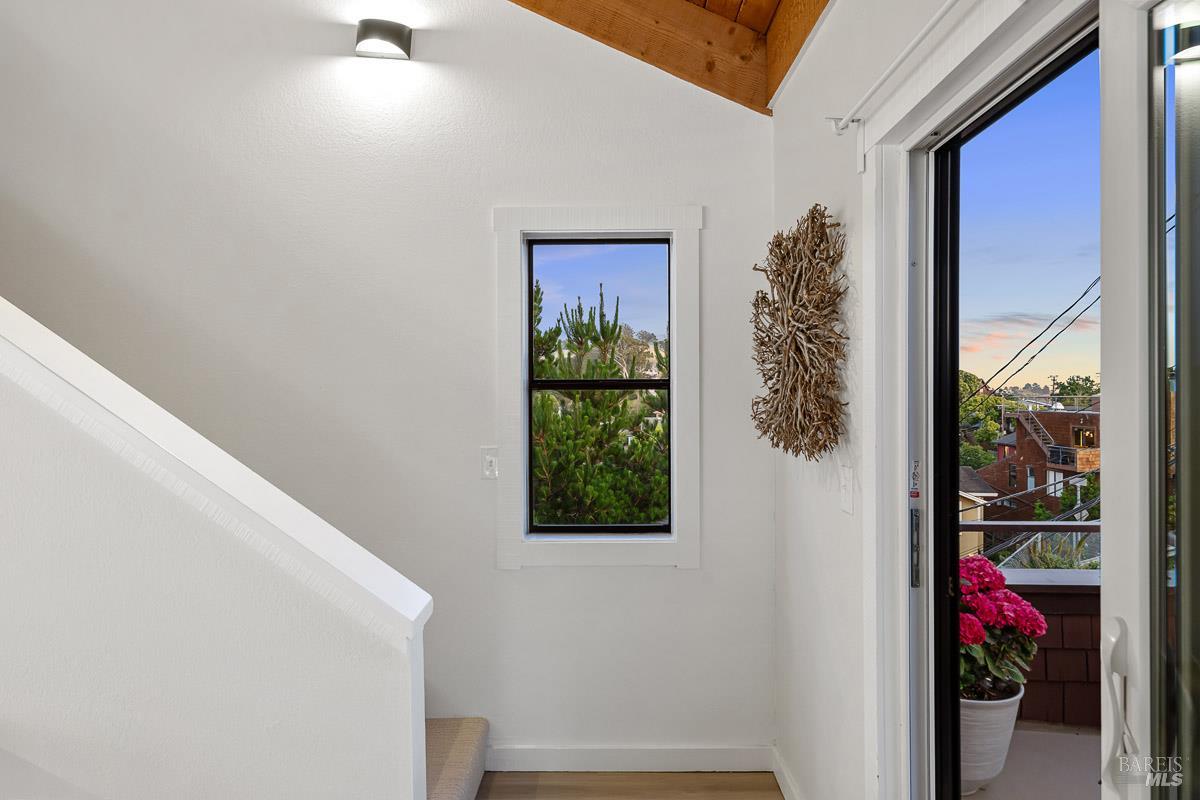
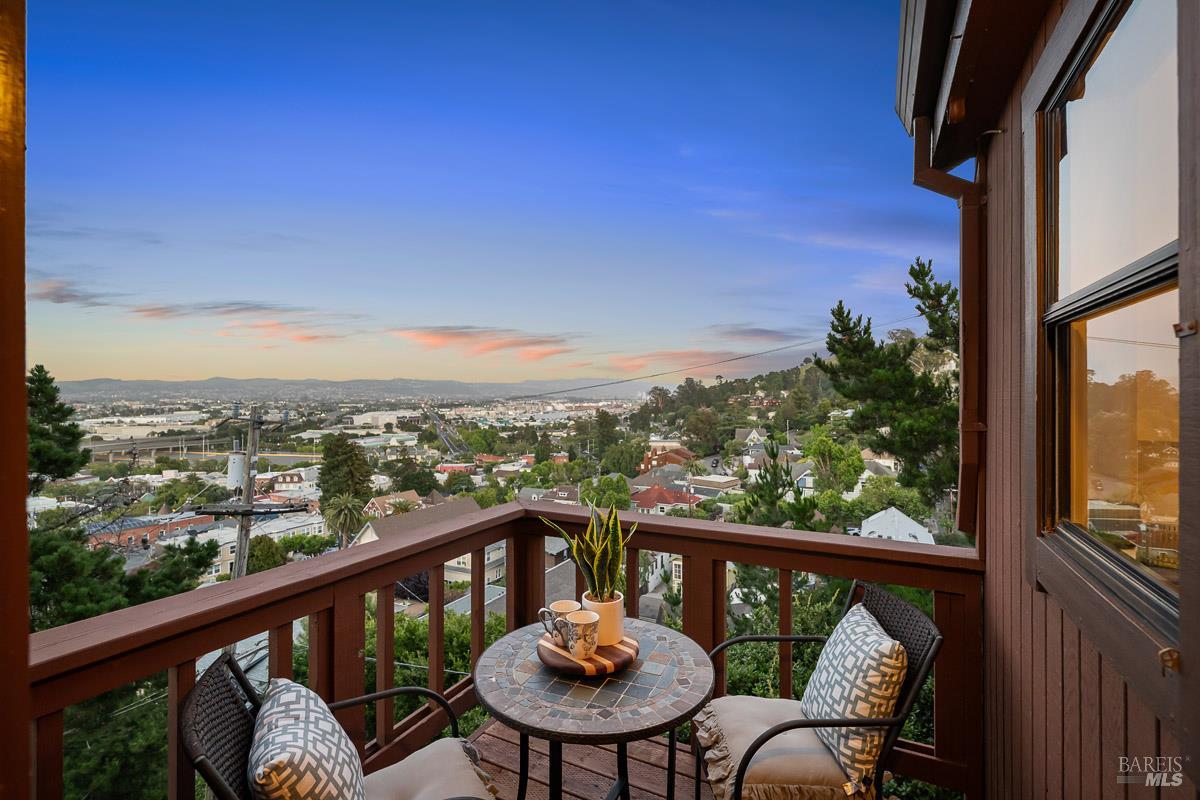
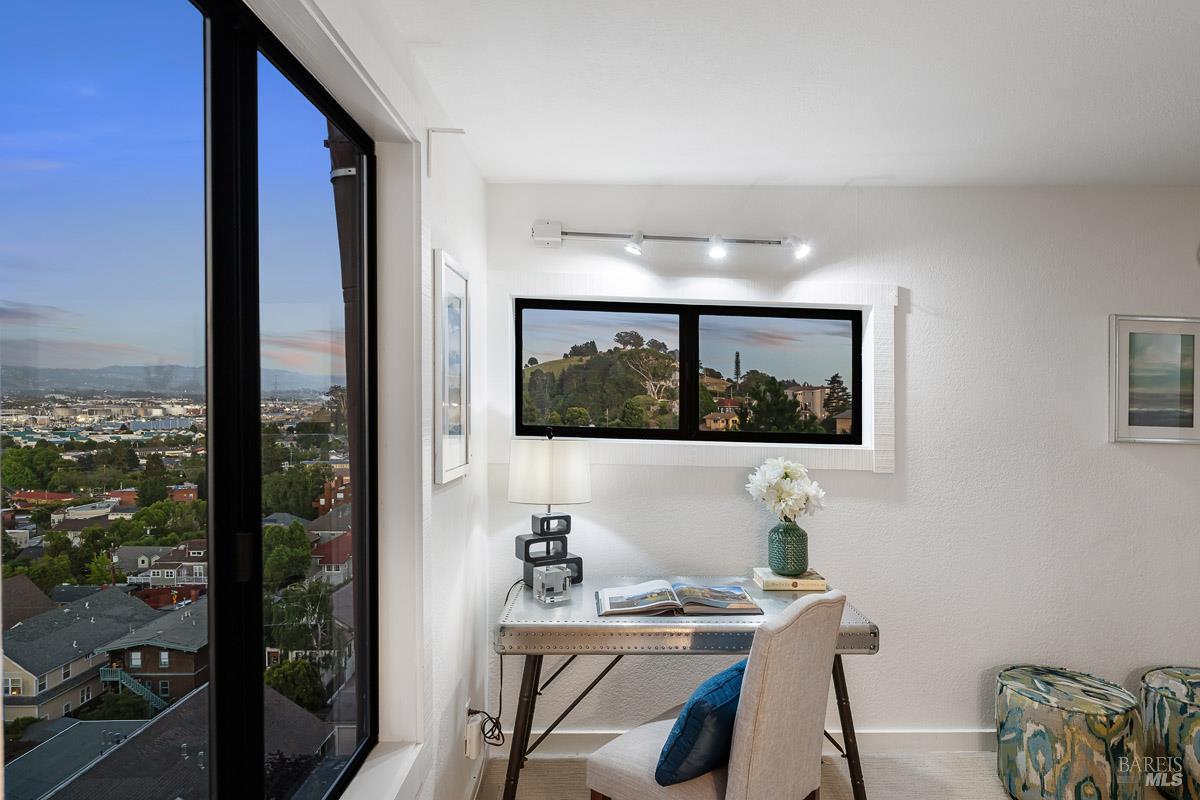
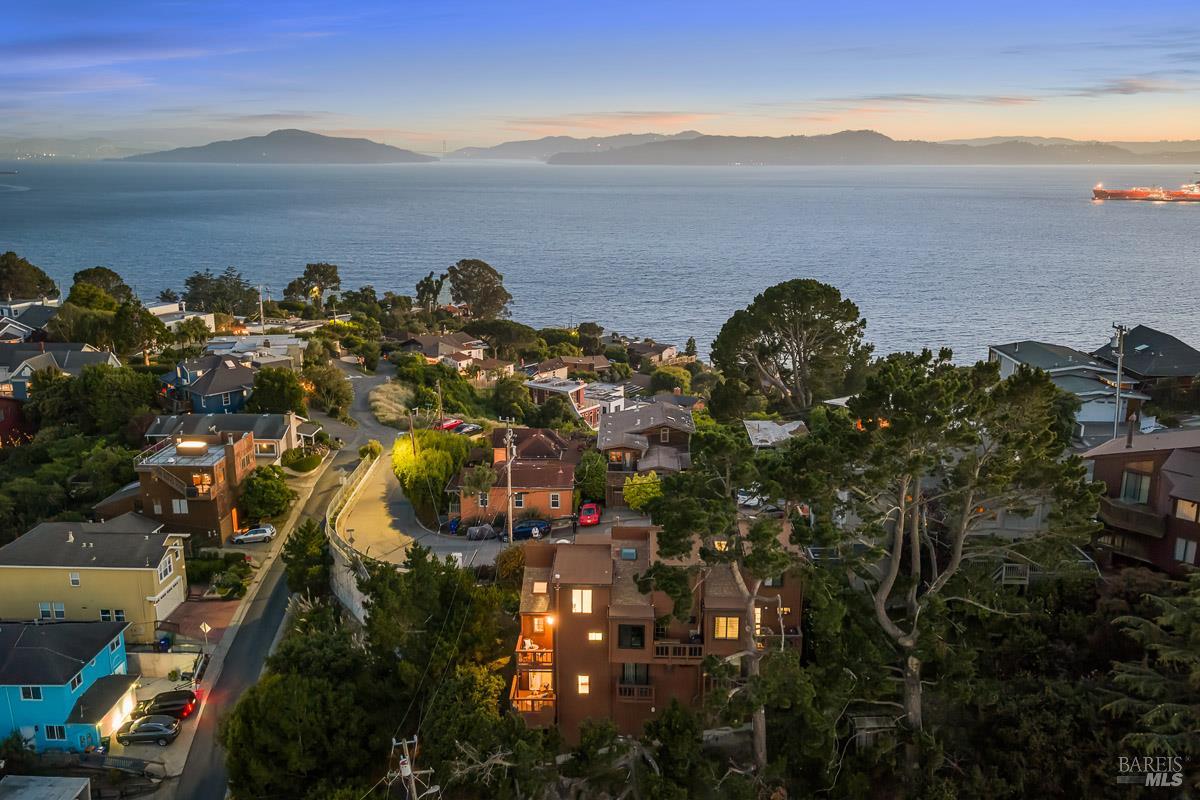
204 Water St, Point Richmond, CA 94801
$719,000Price
2Bedrooms
2Bathrooms
1,317Sq Ft
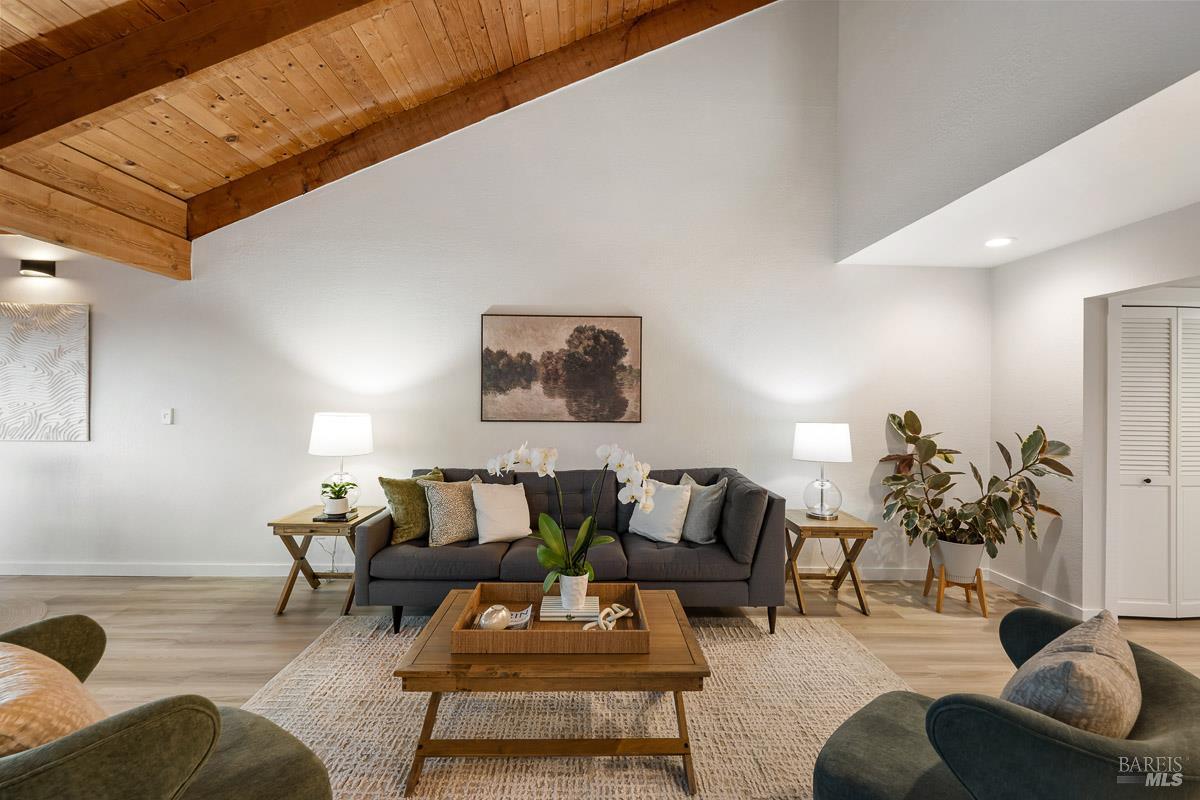
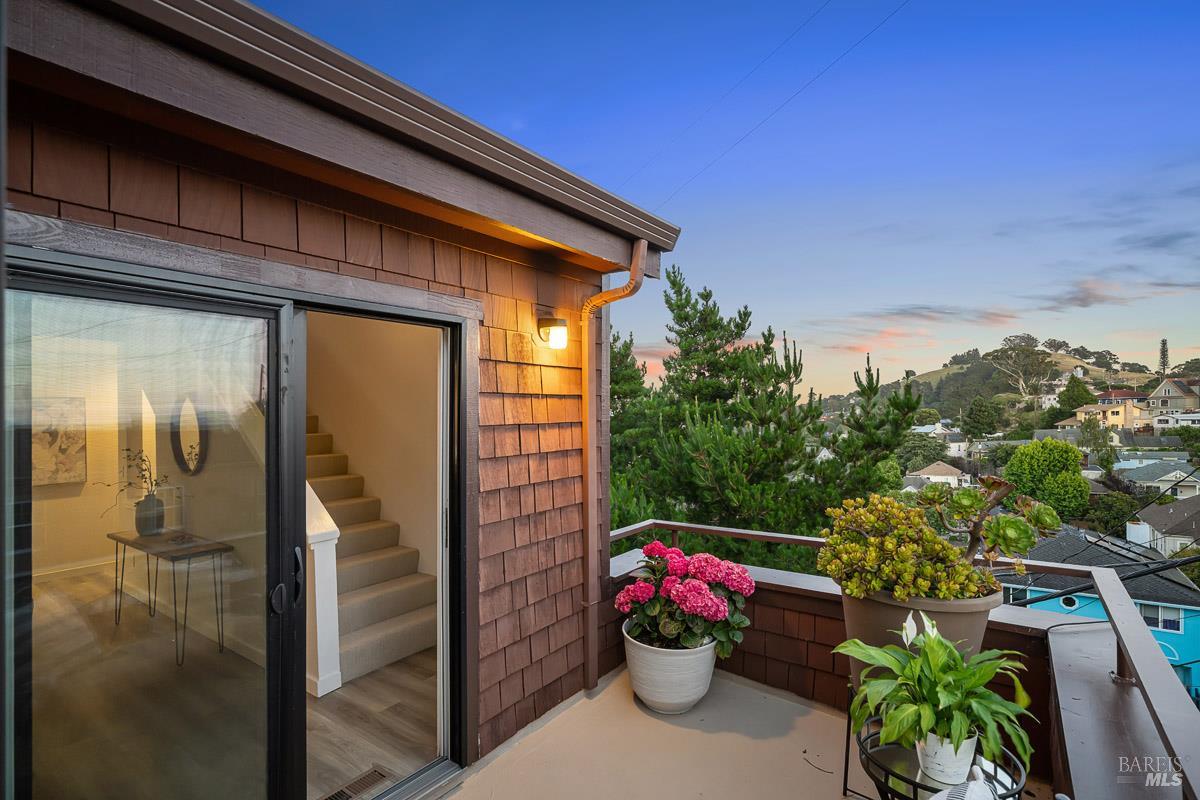
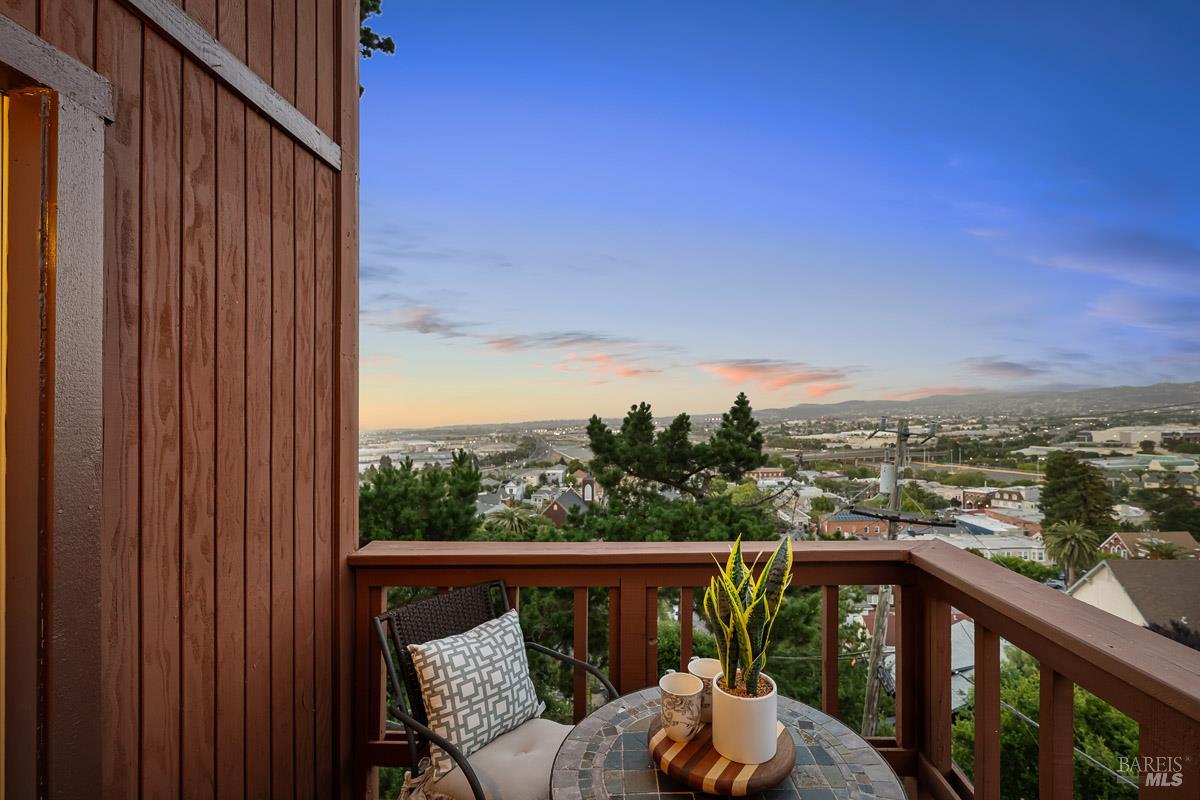
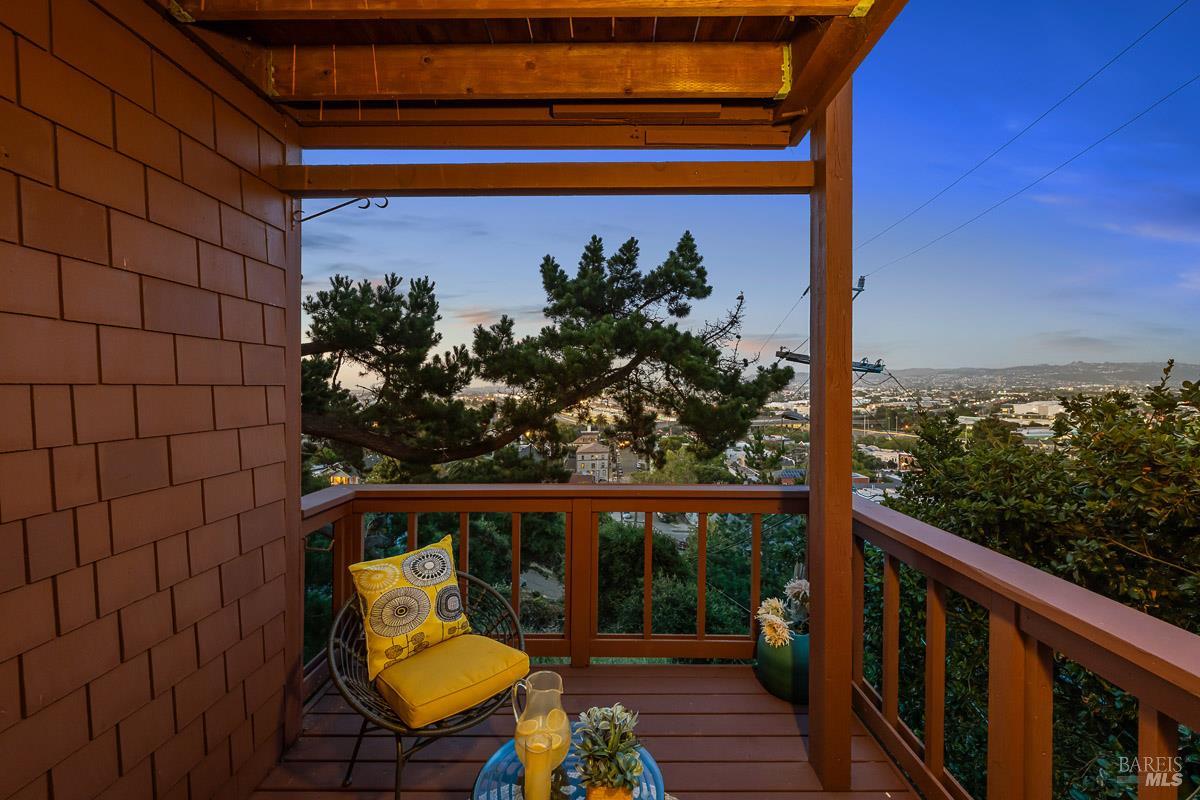
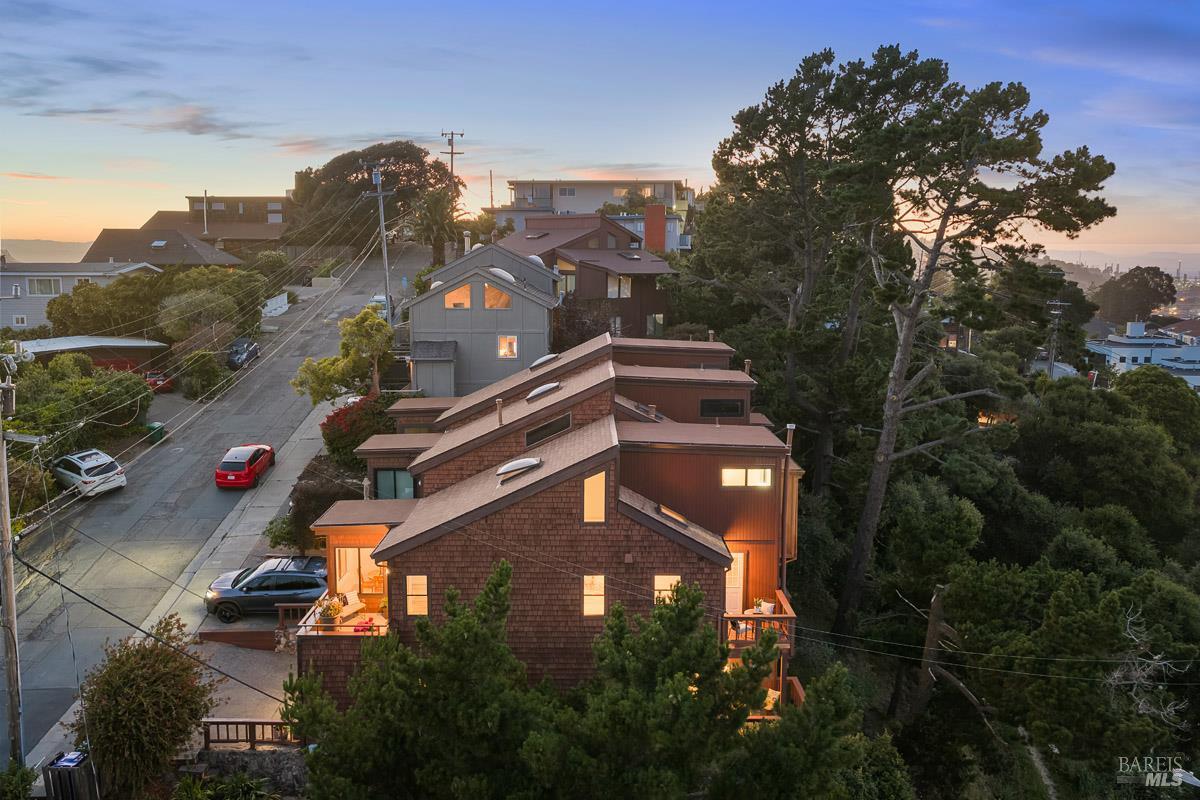
204 Water St, Point Richmond, CA 94801
$719,000Price
2Bedrooms
2Bathrooms
1,317Sq Ft
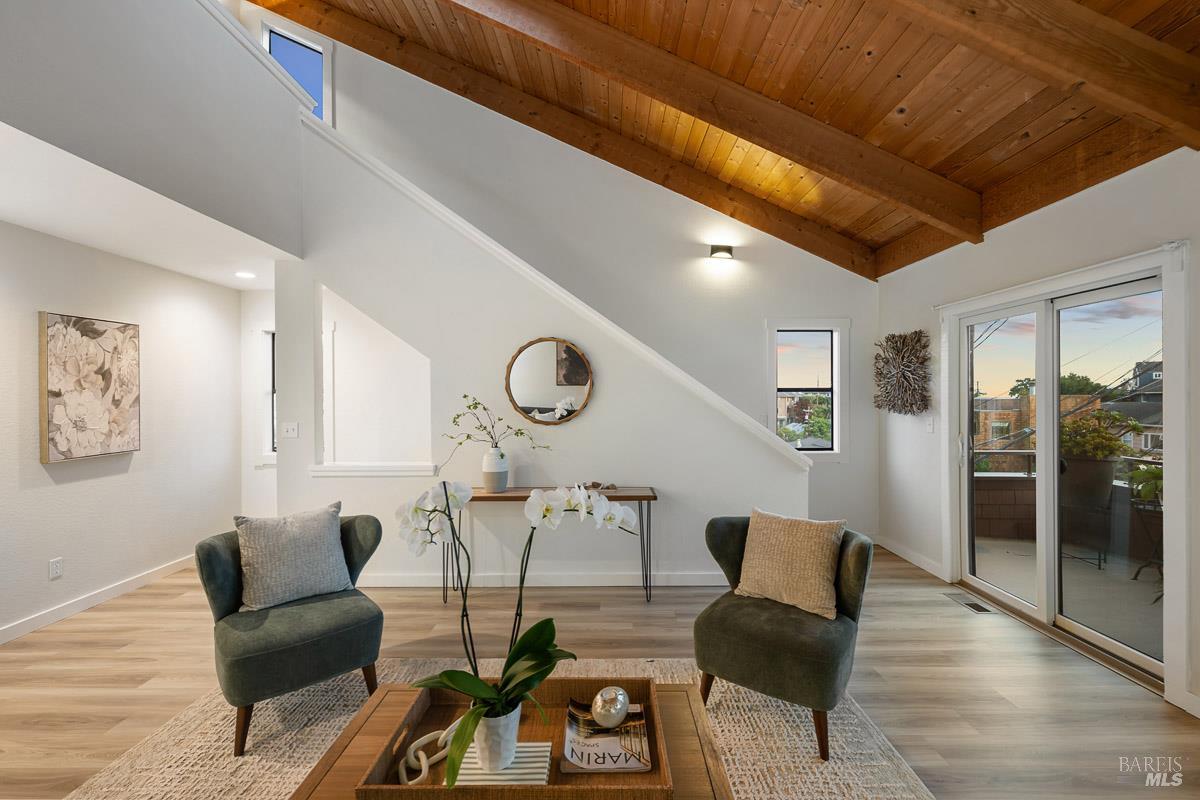
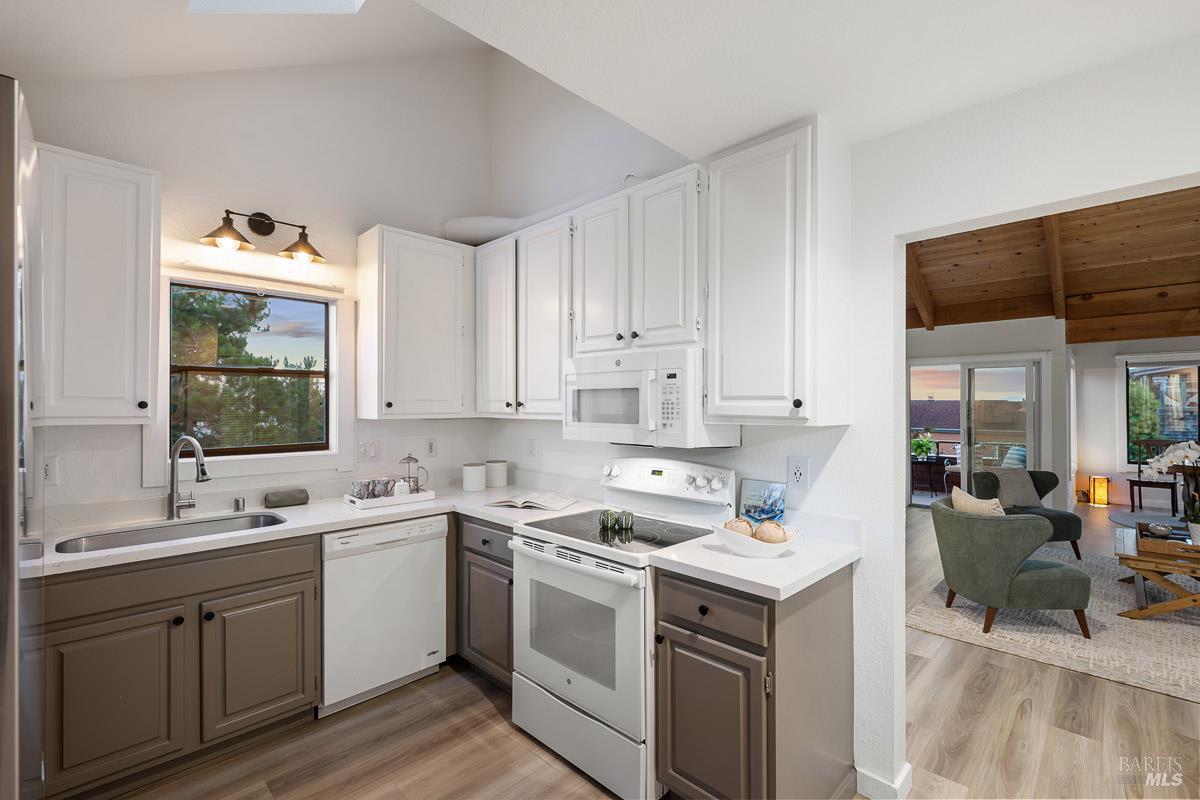
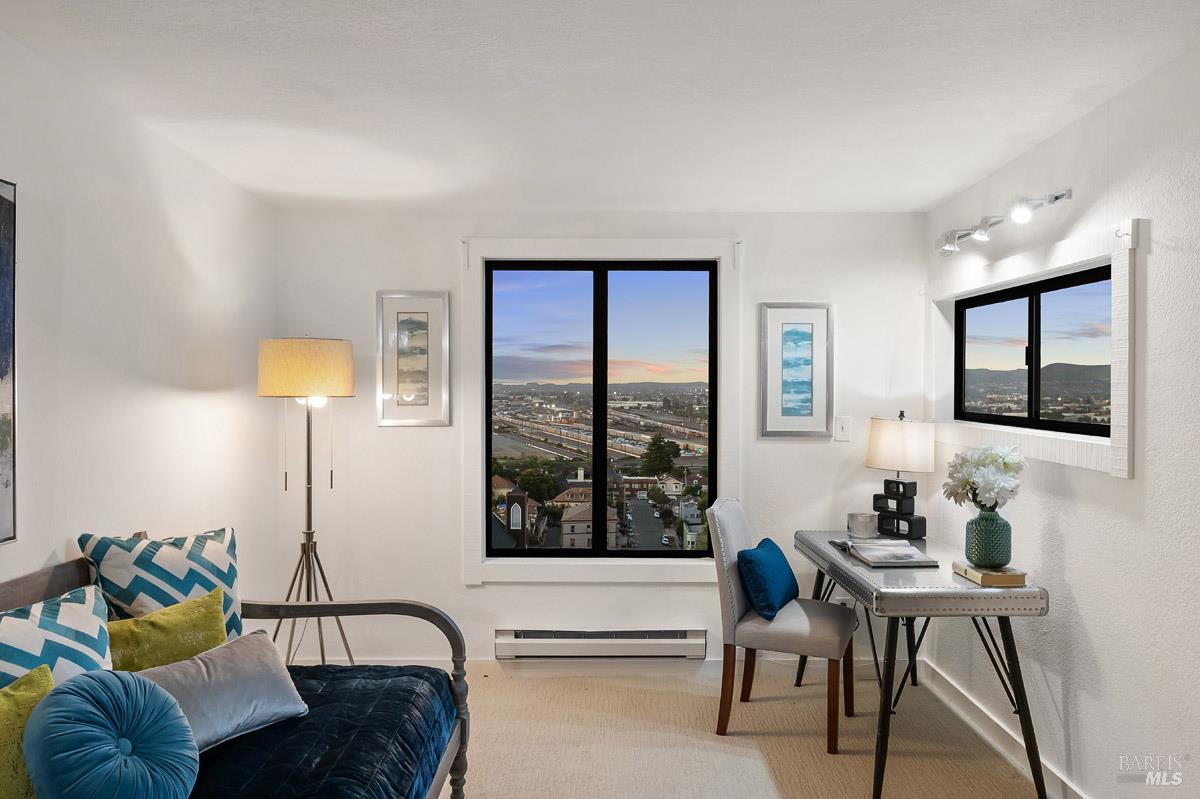
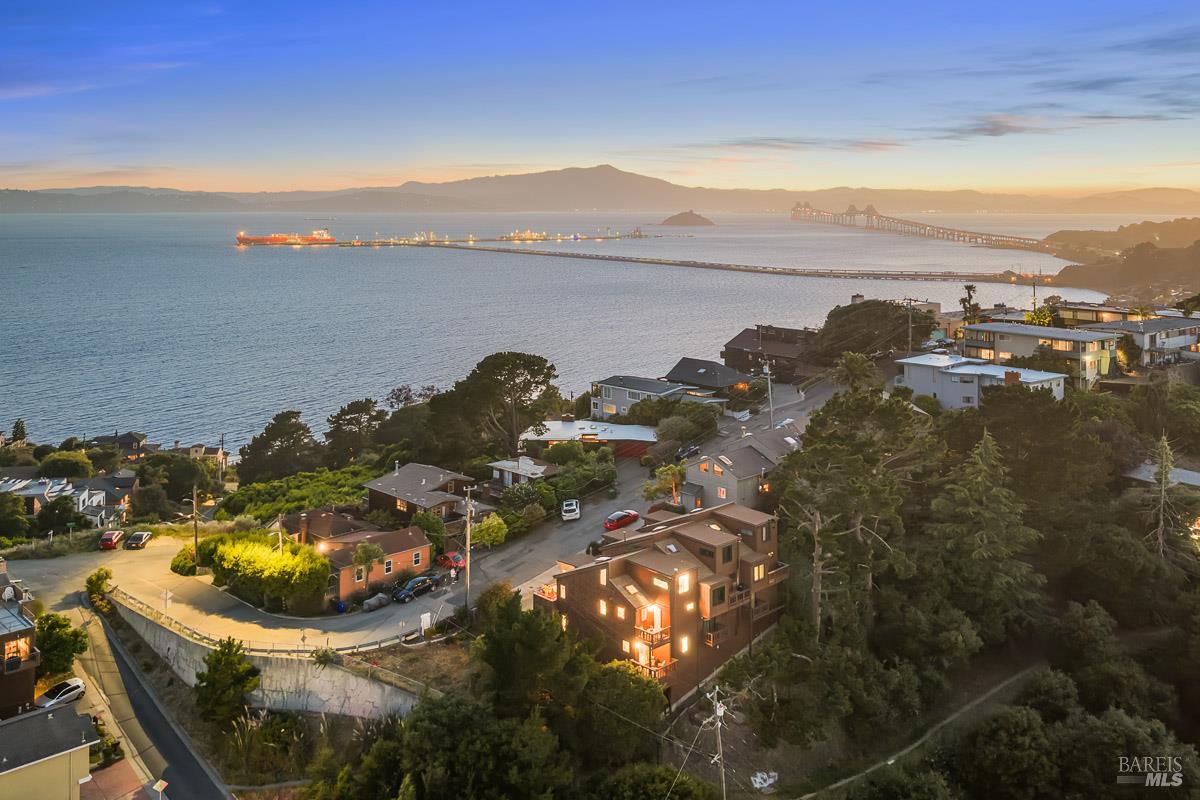
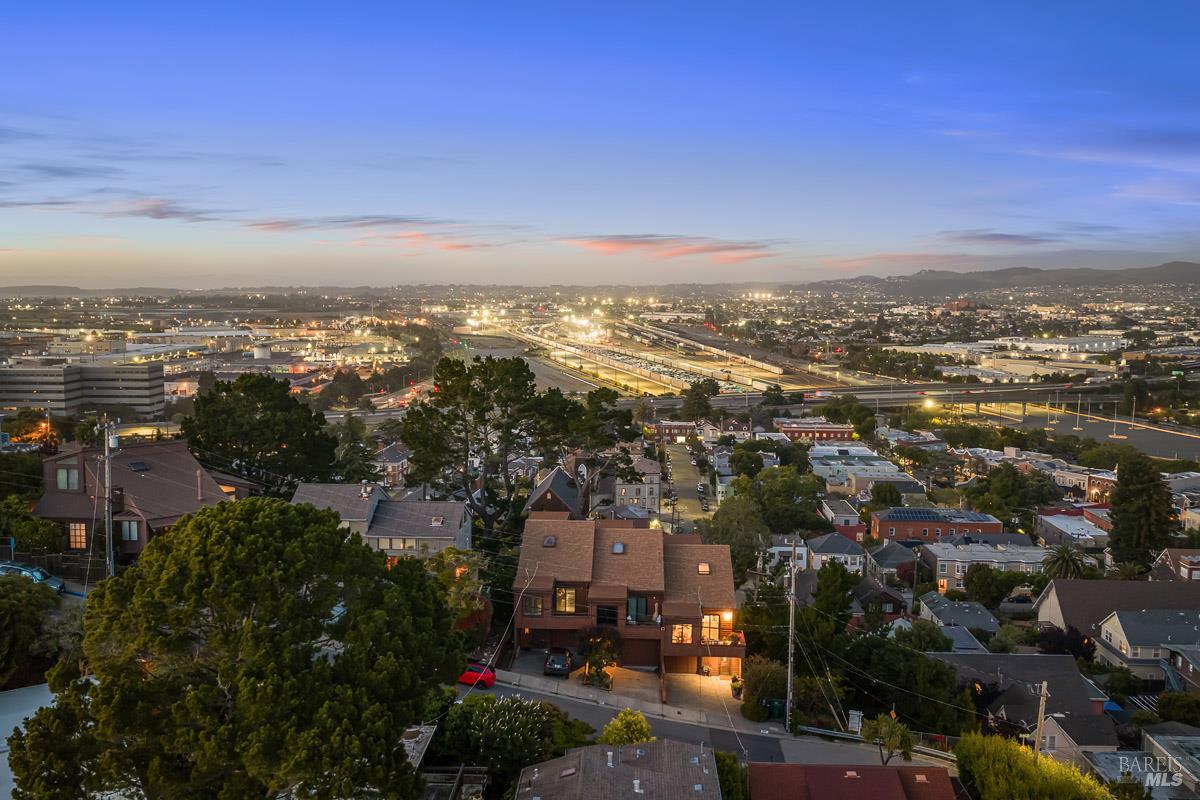
204 Water St, Point Richmond, CA 94801
$719,000Price
2Bedrooms
2Bathrooms
1,317Sq Ft
204 Water St, Point Richmond, CA 94801
$719,000Price
2Bedrooms
2Bathrooms
1,317Sq Ft
204 Water St, Point Richmond, CA 94801
$719,000Price
2Bedrooms
2Bathrooms
1,317Sq Ft
204 Water St, Point Richmond, CA 94801
$719,000Price
2Bedrooms
2Bathrooms
1,317Sq Ft
204 Water St, Point Richmond, CA 94801
$719,000Price
2Bedrooms
2Bathrooms
1,317Sq Ft
204 Water St, Point Richmond, CA 94801
$719,000Price
2Bedrooms
2Bathrooms
1,317Sq Ft
204 Water St, Point Richmond, CA 94801
$719,000Price
2Bedrooms
2Bathrooms
1,317Sq Ft
204 Water St, Point Richmond, CA 94801
$719,000Price
2Bedrooms
2Bathrooms
1,317Sq Ft
204 Water St, Point Richmond, CA 94801
$719,000Price
2Bedrooms
2Bathrooms
1,317Sq Ft
204 Water St, Point Richmond, CA 94801
$719,000Price
2Bedrooms
2Bathrooms
1,317Sq Ft
204 Water St, Point Richmond, CA 94801
$719,000Price
2Bedrooms
2Bathrooms
1,317Sq Ft
204 Water St, Point Richmond, CA 94801
$719,000Price
2Bedrooms
2Bathrooms
1,317Sq Ft
204 Water St, Point Richmond, CA 94801
$719,000Price
2Bedrooms
2Bathrooms
1,317Sq Ft
204 Water St, Point Richmond, CA 94801
$719,000Price
2Bedrooms
2Bathrooms
1,317Sq Ft
204 Water St, Point Richmond, CA 94801
$719,000Price
2Bedrooms
2Bathrooms
1,317Sq Ft
204 Water St, Point Richmond, CA 94801
$719,000Price
2Bedrooms
2Bathrooms
1,317Sq Ft
204 Water St, Point Richmond, CA 94801
$719,000Price
2Bedrooms
2Bathrooms
1,317Sq Ft
204 Water St, Point Richmond, CA 94801
$719,000Price
2Bedrooms
2Bathrooms
1,317Sq Ft
204 Water St, Point Richmond, CA 94801
$719,000Price
2Bedrooms
2Bathrooms
1,317Sq Ft
204 Water St, Point Richmond, CA 94801
$719,000Price
2Bedrooms
2Bathrooms
1,317Sq Ft
204 Water St, Point Richmond, CA 94801
$719,000Price
2Bedrooms
2Bathrooms
1,317Sq Ft
204 Water St, Point Richmond, CA 94801
$719,000Price
2Bedrooms
2Bathrooms
1,317Sq Ft
204 Water St, Point Richmond, CA 94801
$719,000Price
2Bedrooms
2Bathrooms
1,317Sq Ft
204 Water St, Point Richmond, CA 94801
$719,000Price
2Bedrooms
2Bathrooms
1,317Sq Ft
204 Water St, Point Richmond, CA 94801
$719,000Price
2Bedrooms
2Bathrooms
1,317Sq Ft
204 Water St, Point Richmond, CA 94801
$719,000Price
2Bedrooms
2Bathrooms
1,317Sq Ft
204 Water St, Point Richmond, CA 94801
$719,000Price
2Bedrooms
2Bathrooms
1,317Sq Ft
204 Water St, Point Richmond, CA 94801
$719,000Price
2Bedrooms
2Bathrooms
1,317Sq Ft